Hi! Did you bump into this post from the pin on [email protected]? Check on my current progress on my user posts! This account is a dedicated alt for this project alone, sorting by my new posts will show the latest on this project.
Hey 🥰 I'm a transfem who's been working on something that I think might be of interest here and I'd love to share, because I believe that we can share a very mutually beneficial relationship. This post is about permanent hair removal.
I am going to use the term "transfeminine" in the following as an abridged version of "transfeminine, non-binary, and any other individual, queer or not, who would feel more confident and affirmed with less facial or body hair". This is a project for everyone.
A little bit of background on permanent hair removal:
Really, the only two options on the table are laser/IPL and electrolysis. Speaking to the former first, laser/IPL is without a doubt the most accessible of the two options, but it comes with a lot of drawbacks. For one, laser/IPL is neither permanent nor complete. This may sound like an immediate dealbreaker, but the ability to delay and diminish hair growth down to light wisps for months to years at the cost of only a handful of sessions makes it a valuable instrument in transfeminine gender affirming hair removal. The drawbacks don't end there though; another serious and deeply unfortunate drawback of laser and IPL hair removal is that they don't work on all skin tones and hair colors. The mechanism of action depends on light passing through the skin and being absorbed by hair roots (which then heats up the follicle, damaging it, hopefully, to the point that it is unable to continue growing), meaning both light skin and dark hair are requirements for eligibility. This is deeply unfortunate for all but People of Pasta.  There are other drawbacks, like an increased incidence of adverse skin reactions relative to electrolysis, but the two issues noted above make it a non-starter for black and brown folks and extra-bleached-flour crackers. These issues in mind, laser/IPL is a tool that can be relied on at times, but for trans folks, laser/IPL is a non-starter for bottom surgery preparation due to the incompleteness and temporary nature of the procedure.
Electrolysis is permanent, 100% complete, works on all skin tones and hair colors, and has a lower incidence of skin-related side effects. Perfect! What's the catch? Electrolysis is expensive as fuck. Where a complete course of bikini area laser or IPL may cost hundreds of dollars, the same area with electrolysis will cost thousands, sometimes as high as tens of thousands of dollars, due to the fact that unlike laser/IPL, which takes a second per exposure and can be done in areas of hundreds of hairs at a time, electrolysis must be done hair by hair, which is a lot of time to spend with a licensed cosmetologist/electrologist. Costs are similarly prohibitive for facial electrolysis, and even more wildly exorbitant for body hair removal due to the large surface area, so much that it is virtually never even discussed as an option for this. This won't do either. What is to be done? 
The mechanism of action of electrolysis hair removal is to insert an electrode in the form of a fine needle down the hair shaft and pass a current through the electrode, into the hair root, and out through a return electrode elsewhere in the body. This causes an electrochemical reaction in the hair root that produces a few nano/microliters of lye, which super, definitely, for sure kills the hair. (if you know the difference between galvanic, blend, and thermolysis, you're way ahead of the class, good eye but I'll bring it up again later.)
At home electrolysis exists, but it is not easy or cheap as it currently stands. Issues with machine quality, battery consumption, and power make this an option, but an undesirable one. My hope is that we can make it easier, cheaper, and safer, by designing an option that is more robust, more available, eats through fewer batteries, operates with greater power, and is designed with constant dynamic community dialog.
One thing I didn't lose in my transition is my audacity: surely I can make a device that applies a small current through a fine needle-like electrode in a short burst, right? So I got to researching. Can I buy professional-quality electrolysis needles without a cosmetology license? (yes, I can!) Are there readily accessible schematics for precision low-amperage current sources widely available? (yes, there are!) Are there resources available not paywalled behind cosmetology/electrology programs to learn to use this thing once I have a prototype? (yes, there are!) Has anyone tried to do this before? (Yes!!! Twice!!! More than that! Reddit user /u/abbxrdy, Github user ivanbarayev, the folks on the Hairtell forms, and Andrea James at Transgender Map, I have so much love in my heart for you. Here's to hoping that your work forms the foundation to bring accessible hair removal to all.)
My goal is to make a highly buttoned up, safe, accessible, and presentable electrolysis solution for transfeminine people to use on themselves, each other and for others to use on them. I want to cut out the cosmetologists, or specifically those in the electrolysis chain that take the surplus value from transfeminine people, like salon owners and machine manufacturers. I also want to avoid reliance on sparsely available, weak, and poor quality machines, which are the current sole option for at-home electrolysis. Ultimately, the goal is to bring safe, highly effective, and accessible electrolysis hair removal to all. Currently existing solutions generally fail on at least one of these. My objectives are as follows:
- Develop a circuit that can administer a 0.1 to 10 second pulse of current between 0 and 2 mA at a voltage between 0 and 25 V through an electrode upon each press of a button, foot pedal, or even bite switch, with no wall plug-in for safety reasons - battery power only.
- Make it into a printed circuit board that can be ordered and built out with no more than a soldering iron and YouTube tutorial level soldering skills.
- Develop a design for a probe that can hold an electrolysis needle, that can be actualized at home, without any advanced tools.
- Create a high quality and easy to follow manual for the build and usage of the device. This is missing with all current DIY solutions. This has to be something that is truly accessible to all - no electronics knowledge, wiring, debugging, multimeters, or anything else like that necessary.
- We're shooting for a budget under $100, but in general, cost is a deciding factor. It's not accessible if it's expensive.
- For now, my intention is to start with a galvanic only electrolysis machine. Blend and thermolysis produce much faster results, but I don't feel as confident working in high frequency electronics, and with galvanic being the most reliable option, despite being slower, it's the obvious pick for the 1.0 version. If this takes off, the plan is to continue with a blend or a mode-selectable version, which would really democratize electrolysis. If this works, blend electrolysis provides ten times faster hair kill time, and it's next on the menu. 👀
Here's what I'm capable of doing by myself:
- I'm an experienced multidisciplinary engineer. I have the skills to see through a basic version of this project to completion.
- I can also write a nice assembly and usage guide, I have experience in guide and technical writing for laypeople.
- I can bankroll all R&D and prototyping.
Here's what I would definitely benefit from community help on:
- I work terribly alone. I find it hard to get motivated if I don't have a team to share the work with or at least bounce ideas off of. I'm also not deeply experienced in this, and community collaboration will get rid of a lot of stumbling blocks that are probably easy avoidable. If you're experienced in analog electronics, you're the number one type of person I'm looking for, but I'd also love to work with digital/embedded folks when it comes to interface/UX time, or additionally anyone with electromechanical design experience for the probe.
- Saving the above, I still do much better with folks on the sidelines cheering me on, asking me questions, and keeping me accountable than I do alone, even if I'm working by myself.
- If you're a professional electrologist, I'd love to know what you like and don't like in a machine, what features are mandatory, what features are nice to have, and what features are pretty useless. If you have any other tips and advice, let me know!
- If you've tried DIY electrolysis before, please tell me how it went and how I can do better than whatever your most recent attempt was!
- I need help discussing the licensing. Do I want to go hardline GPL to prevent this from being picked up by manufacturers? Do I make it as open as possible with the hopes that someone can fabricate nice ones? Do I allow for manufacture with the provision that royalties be paid to some entity, which can then be redirected to some mutual aid project/charity/Maoist insurgents? Maybe even use a personal use only clause so I reserve the option to sell units as a worker's cooperative? This is all cart before the horse shit, but it's stuff that needs to get worked out before I make a github.
- What do I call it???
Going forward, I plan to post regular bi-weekly updates to keep this alive, days of the week pending Maybe Thursday and Sunday?. Look forward to the first journal entry/post tonight where I show off what I have so far! I think /c/diy is the most applicable place to post due to the comm purpose, but this initial post is getting cross-posted to /c/traaaaaaannnnnnnnnns due to the relevance in that community.
Let's stay in touch! This is an alt but I'll be checking it frequently. Thanks for being an awesome online community and I hope this can happen in a way that results in material good for my comrades. 
As you can see it used to have some plastic covering. The frame is held together with (sorta brittle) plastic pins but my main focus is how I'd re-cover the frame in plastic:
-
What sort of adhesives should I consider for outdoor metal-plastic bonding?
-
Is adhesive and soft (clear) plastic even a good idea?
-
Have any of you done something similar?

The light came with an alternate mount that screws on to the handlebar but it makes taking the light off more annoying, and obviously removes the ability to freely put the light on different bikes
I was hoping this design was universal but none of the straps I'm seeing online have the screw hole. Well, there is one very similar strap but I'd have to pay 13€ postage on a 5€ item which offends me on a spiritual level

We miraculously managed to get a good deal that we could blow all our savings on to get this new HVAC unit installed about a year ago. In the last few days, it's suddenly started producing a sour smell, particularly in my room. Looking up the issue, all I see is people saying to call someone to get it cleaned because it's mold and/or bacteria build-up. I changed the filter, but the one that was there was barely dirty at all, so I don't think that was much of a fix.
I can't go into detail, but there's a lot going on right now and we can't afford much. We barely even have time to organize fixing something like this. But I don't want to take risks with our health.
Can I get some advice please? What would y'all do?
*also my god the youtube algorithm-fueled thumbnails that come up when searching for tutorials on what to do about this are truly horrendous, look at this shit, just straight up embarrassing

Got some time this week to get on with woodworking, and I've made something I've been planning for months at this time but couldn't get to doing:

So yeah, it's simply a pine wood structure composed of two 100x60cm^2^ boards, one of which is simply lying on the shotgun and rear seats when folded, and the rear board has a cutout for that weird grey shelf of the trunk, and I cut some mortises in it to fit the base I made for it.

Here you can see the mortises and tenons more in detail. I went with this instead of screws because it's cheap and doesn't require additional hardware, it's easy to assemble and disassemble, and I honestly have fun banging mortises with the chisel and mallet

Here you can see it with the foldable high density foam mattress I picked up on AliExpress for like 45€, which is honestly more comfy than expected if you don't mind a hard bed. I'm a super tall guy so the whole thing needed to be 2m long, and I made it 60cm wide, the same as the mattress.

The support structure for the bottom conveniently disassembles into three pieces and takes very little space in the trunk!

Finally, the whole thing disassembled and in the trunk. I'm quite stoked of how it turned out. The total cost hovers around the 80-90€, I spent essentially 45€ on the mattress (whose plastic cover will obviously be removed once I start using it) and around 40€ on the wood you're seeing (I locally bought for 85€ a 22mm thick pine board of 240x120cm^2^ and used about half of it). There's really not much more to it, since I used no hardware, and I banged it all using handtools on the roman workbench I featured in my previous DIY post.
Oh btw the car is a Renault Grand Scenic from 2006, an old diesel beater I bought for 2000€ with 200.000km some months ago with this idea of travelling around Spain with it. It's pretty long so it's nice for a tall guy like me to be able to lie down fully inside it, and also it's quite fuel efficient, running at around 4.6L/100km in my experience over the past months.
Thanks for taking a look :)

The wardrobe was massive and a god damn awful pain in the arse to unbuild (and too big to take to the tip in our tiny car) but it had to be done, leaving this gross wallpaper and possibly damage all the way to the original plaster from ca. 1907.
The shelving tracks on the right are ancient and the screws just wont budge at all. There's half a dozen layers of paint and wallpaper making it worse (you can see how deep it goes where the shelves have been in place even longer). Any ideas on decimating some old ass screws would be cool. We can afford to hire or borrow powertools if that's necessary.
EDIT oh we peeled some of it back and the plaster is fucked to the brick lmao

I've been wanting to get going with woodworking on my newly made low roman workbench for a while now but I couldn't due to thesis manuscript.

Here you can see some rough planing of the surface of another workbench I wanna make for a buddy of mine, I'm gonna make a wooden bow workshop over the summer with friends and they need work surfaces to be able to do so. Thankfully I found a very cheap supplier of lumber in the province of Cuenca and the entire workbench will set me back only some 10€, kinda crazy.

This picture is just mood tbh. I love the little corner I have for my woodworking, the low workbench working both as seating and as workbench simultaneously makes it super compact, and the light was beautiful, finally it's the sunny season in Spain after a few months of unusually rainy spring

Here is the try square I wanted to make, finished and coated in linseed oil. I made some paste wax following the recipe of Wood by Wright (2 parts beeswax, 2 parts linseed oil, 1 part mineral spirits). This try square will open up a lot of possibilities regarding stock dimensioning and precise planning and lineup drawing, I'm stoked about it and it turned very straight!

Finally, a pic of the piece of log from which I split the wood to make the try square, it's from a tree they cut down locally and I hauled it home by hand, so yeah, free wood!! It's super hard, no idea what species it is, I'm used to pine and fir, so working with a hardwood like this is surprisingly different

My Instagram, in case you're into this sort of thing (Lego).

I finally got around to making my own book. Its for my wife to introduce her to ML.
It looks really ~~janky~~ rustic and I hope it holds together well but we'll see I guess. Unfortunately I was careless with the glue in when sticking the text block to the cover and so it looks really dirty.
I typeset it myself in LaTeX then printed it on regular A4 copy paper, which unfortunately has the wrong grain direction since I want to fold it but finding proper paper is impossible. I'm going to buy a huge roll of paper and cut it myself next time probably since its rather cheap actually, like 20€ for a roll of 0.61x50m A1 paper.
Bound it with the cheapest linen thread, waxed with paraffin because I still dont know of a good beeswax alternative, glued the spine with regular white craft glue. The tapes are really thin linen gauze. I got the boards from the back of notebooks and glued it all together with corn starch. I think this whole book of 300 pages = 75 sheets cost less than a euro since its basically paper, toner, some thread, some gauze and a few grams of corn starch. Oh and the wrapping is some brown packing paper.
I'm hoping to make a couple books like this so I get a library going but I dont know if I'll bind it on board again or just glue it on some carton. It's a lot more effort to glue it on board and they're still warped despite all my efforts.
I'm thinking of printing the covers on 120gsm cardboard and gluing them together over the spine basically thread the linen gauze through the back cover and glue it on, then glue the front cover so the tapes are sealed. then I could just tip the textblock on the covers and it would cause that much warp. Dunno yet though. First I gotta typeset "Imperialsm, the highest stage of capitalism", which is next on the list.


Dear friends,
Last month, I posted this big project idea of mine to Hexbear's as well as Beehaw's DIY communities. Now I'd like to give you an update.
All figures I'm referring to are here: https://imgur.com/a/b8vGfQf
First, a big thank you to all who have replied, you've helped me a lot in making this project a reality. I have distilled your answers, tips and critiques into a text document, and I can happily tell you that they gave me a more realistic understanding of what I want to accomplish.
I formatted the post like this because it's quite long, and I like to yap, as the kids say.
General thoughts:
So, my original post showed the project as I envisioned it for a while now. Many of you have made me realise that there are a myriad of factors to consider, just for hanging the shelves on the wall ... not to mention the difficulty of sawing, building, painting everything yourself, as well as the price! Good lumber ain't cheap, kids! I didn't mention it in the original post, but for a while, I was also thinking of a solution as described here, but I really need something sturdy, and I didn't really care for the aesthetic look of it, so I dismissed the idea.
Friends, I'm happy to say that I think I found a middle ground. There are still some questions to be answered and difficulties to overcome, but I haven't been this excited (manic) about this project since a while now. Here's the plan:
My current plan, basically:
- See fig. 1.
- I ended up deciding to build the whole thing out of IKEA Kallax shelves and cut-to-size painted wood.
- Two IKEA 4x1 Kallax shelves (002.758.48) replace the vertical support beams, which I called "L-shaped studs" in my original post.
- In between those two Kallax shelves (198cm), there is a wooden board, that has been cut to the appropriate size and painted white. This board also acts as a shelf and sits on top of the two Kallax-es.
- Below this, we find the TV sideboard (also Kallax, 705.620.87).
- Between the TV sideboard and the tall Kallax shelves there is about 25 cm of space, perfect for two loudspeakers.
- On the extremities of the wall, there are two desks, built from a smaller 2x1 Kallax shelf (903.015.55) and a wooden board.
- Above each desk there is even more shelf space, which is mounted in between the top of the "Kallax towers" and the wall on either side: another wooden board, cut to the appropriate size, white.
- As we go further and further upwards, my ideas are less and less concrete. I can imagine different configurations going upwards.
- On top of both 4x1 Kallax towers, there could be yet another pair of 2x1 Kallax-es, to really get the most of the room height.
My current plan, the construction in detail:
- The main hurdle is the almost 2m long space between the two "towers". I'd like to have my record collection on there, so the load will be heavy to very heavy. Obviously, this means I need to get a strong wood: I was thinking oak, larch or beech (?)
- But buying strong, expensive wood only helps me so much. I can't just mount an oak board to the wall and the Kallax towers with a couple of brackets and screws, and hope for the best...
- [fig. 2.] This is why I want to make two half lap joints at each end, and lock them together with the desk shelves.
- So my idea is to make one 5m long board out of three smaller ones:
151x39 cm: (length of desk + length of Kallax tower) x (width of Kallax)
A second 151x39 for the other side
280x39 cm: (length of Kallax-es on either side + distance between them)
- I have access to basic machinery to make the lap joints, I also want to invest in some hand tools to make this. I've always wanted to do this, and it seems doable (???), if I make two or three practice joints before ruining a €200 piece of oak
- The 5m long board will then be secured to the Kallax towers with screws, and supported on the back wall with an angle profile, as well as mounted on the side walls with brackets.
- Obviously, to support most of the weight, the Kallax towers will need to be bombproof, mounted to the thick, brick walls with strong dowels.
- [fig. 3] I have a baseboard (ca. 6,2 cm high and 1,7 cm wide) that I need to build around. I want the Kallax towers to be flush with the wall, so I'll screw some feet to the bottom of the towers.
- In the section above, I wrote that I would maybe want to set another 2x1 Kallax on top of the 4x1, constructing an epic 6x1 tower of biblical proportions. This would have the added benefit of securing this 5m long board even more (I think...?)
- Then, I'd have just under a meter left to go to the ceiling. Here, at the top, one could store things needed very rarely, or have plants... See the next section for ideas like that.
- [fig. 4] Short point on the desks: the whole of the Kallax series is 39cm deep. That's a bit narrow for a desk. That's why I'll cut wood to the size of 110x60 cm. The small, 2x1 Kallax acts as one of the legs, while the other corners are supported by wall brackets. This means, that the desks protrude further into the room at 60cm, while the rest of the construction is narrower by 21cm. This also means, that there will be a small space inbetween the 2x1 Kallax (desk), the back wall, and the 4x1 Kallax (tower). That space (ca. 0,7m²) can be used for various storage needs.
My current plan, design and decor:
- I made a couple of sketches of how things could look like, and I'd also love to hear your ideas.
- [fig. 5 & 9] Let's start with the centrepiece: I was toying with the idea of getting a projector/screen instead of a TV. The screen could be mounted in between the Kallax towers, and the projector on the other side of the room above the couch. This could leave the central area much more open. Then you could have – for example – an old, broken CRT TV as decoration; or a statue, some type of artwork on the wall; three potted plants, etc ..... For now, I've decided to scrap this idea, and I felt like I could come back to it at a later point if I feel like it. The TV will obviously be mounted on a swivel. The back wall should be decorated/painted/wallpapered in some way, I just don't want to have it white. I've always wanted an LP stand, to get a "Playing right now: ..."-effect. I feel like this space is almost like a small window, it could be made into a cute niche with the right decor and the right lighting. Speaking of, I'm very open towards the lighting situation, since I don't know anything about that and have no clear vision of what I want it to look like; maybe also IKEA (Dirigera, 105.034.06)? Furthermore, I'm pretty set on having LPs as well as A/V equipment in the TV sideboard.
- [fig. 6 & 7] Next, the desks: my partner and I are both use laptops. The external screens will be mounted on swivels, and the desks will get retractable trays for keyboard and mouse. Kallax inserts from IKEA (doors, drawers...) can be chosen as needed. Above the desks, as described in the previous section, there is a shelf. Here one could store folders with all sorts of important papers. Or a potted plant, whatever. Beneath this shelf, one could even install some sort of lightweight, hanging rack for stuff needed daily, or space for pens... The back wall of the desk is probably the most exciting part: Magnetic? "Letter rack" style? S-hook-system? Please share your experiences/thoughts/inspo!
- [fig. 8] At the very top, above the centrepiece: I'm leaning towards plants and artwork. If you have cool ideas, I'd love to hear them.
Open questions at the end of all this:
I'd like to hear your general thoughts and concerns!
Which wood for the long 5m shelf?
Lap joints as described above: yay or nay?
Lighting systems?
Back wall of desks?
THANK YOU <3


 Warning: Long treatise about current hyperfixation-turned career plan
After a lot of research into different hydrolysis devices and the principles they operate on, I feel confident that I've satisfied the theoretical part of this step in my plan: I have the plans for an oxy/hydro fuel cell that I really do think will surpass the designs that inspired it in efficiency and safety. Now I just have to do the blood-sweat-grease alchemy to make it real.
My initial idea for a bulky "double decker sandwich" design, where the anode and cathode plates are two different stacks separated by plexiglass, has been abandoned. Rather than keeping the two gasses separate in this way, which would lead to unavoidable efficiency loss, I'm intermingling the stacks for maximum efficiency while cordoning off one gas-producing surface at a time with 3d printed separators which will be included in the sandwich. Instead of separating the groups of plates, I'm separating the individual spaces between the plates. I am essentially building a scaled up version of this: https://youtu.be/klJzWPo-ZZE?
The separators work by taking advantage of the different polarities in the powered cell: basically, the different sides of the 7 plates will together form a little self-contained mirror hall of positively and negatively charged metal. The negative sides always produce hydrogen, and the positive sides always produce oxygen. But in a normal cell like this, these gases are produced together and rise together, forming the explosive HHO which is very cool but mostly useless for my purposes. But with the addition of the separators, we can split the whole unit into alternating negative and positive layers, which share an input (coolant) but split the outputs. We can channel the gases from these layers alternately into twin manifolds, then into their own tanks and eventually, down two hoses and into a hissing sapphire furnace.
The biggest change I personally have made to distinguish this from other cells like it is the planned addition of heavy nickel plating., The second biggest change was including primitive blowoff valves on each bubbler tank, but I really hope for the nickel plating to be a game-changer, and here's why:
It might mitigate or solve the toxic waste problem while seriously boosting the device's power. I may or may not have gotten into this already, but stainless steel, the best balance between conductive and affordable most hydrocell builders can find, is alloyed with up to 10% chromium. This is fine for building stuff, I think, but if you submerge that metal in caustic liquid and zap it with electricity, some of that chromium will leech out into the fuel, making it not just highly caustic but carcinogenic as well. To avoid this, I'm planning to electroplate a THICK coat of nickel on the plates, so thick that apparently they call what I want to do electroforming. If I can add at least a half millimeter of pure nickel to each plate, I'll be a happy fish. The idea is that the electricity will go along the path of least resistance (nickel is several times more conductive than steel) and spare the vulnerable alloy beneath. This would also greatly increase the cell's power efficiency, because
nickel is several times more conductive than steel
The way I proceed with this now depends on my ability to electroform, and the outcome of my best attempt. If there's some reason it can't work, let me know, I can handle the sadness.
Looking ahead to the next step, I finally found footage of a personal corundum furnace actually working, and seeing it's design has refilled the wind in my sails and eased my doubts.https://youtu.be/YiS3ZUuCH3c (skip to 7:20 for the money shot) It's so fucking simple, the combustion chamber is two modified firebricks. The body is a glorified welding torch with a can of oxides on top, and there are a total two pieces of beginner-level robotics in there. Before this, I wondered blindly and anxiously about how I would design the thing. Now, I see that the current step of constructing the gas cell will absolutely be the most expensive and time consuming part. I'm nearing the peak of the mountain, after which momentum will begin to carry me as a friend. Also, I've been keeping the cost of fittings down by taking them all from Ken Langone.
Still, I do have one or two important questions that my comrades here, who are more versed in things like math and numbers, could maybe fill me in on:
-
How do I calculate the gas output of this thing? The amperage I can do, but the output I cannot. I want a cell powerful enough to potenially fuel two Verneuil furnaces at once down the road.
-
I'll edit this in when I remember it 5 minutes after posting


Hello,
Beginner here. With writing this, I'm increasingly thinking I should hire a carpenter, lol. But I've been wanting to post this for months, so here it goes.
What do I want to build?
I want to build a desk/TV sideboard/shelf combo, that takes up the entire length of a 5-meter-long wall in my living room (see image).
- There's the 'lower part': 60cm deep, 75cm high; two desks on either extremities (i.e. in the corners of the room), flanked by drawers and storage options for all matter of things. The centrepiece is the TV-sideboard, with cupboards for storage and an open solution for A/V devices.
- Then there's the 'upper part': 40cm deep, 200cm high; this is like a shelf that sits on top of the 'lower part', but it is narrower by 20cm. This will be storage for books, records, work stuff, etc... I am not planning on having a back wall on the shelf.
What are the circumstances?
I live in a relatively small apartment (~ 40m²) with my partner. The apartment is a pre-WW1 house, with a room height of 3,2m. The 5m wall is brick, and behind it starts the next house, so it's plenty thick. The living room itself is about 19m².
My questions to the community
My main question is basically how?
- Is it smarter to build the 'lower part' all in one first, then build the 'upper part' on top? Or is it better to build everything around the two L-shaped studs, that separate the desks from the TV? I imagine that the first option is easier to build, whereas the second option provides more stability.
- What tools, screws, wall plugs and techniques would you use to build this? More specifically: how do I anchor things to the wall?
- The material should be wood – but which one would be appropriate?
- I have a couple of other questions, but I'll leave it at that for now...
Thank you so much for replying and taking an interest.

this is the handiest I have ever felt
someone had already posted the shape online so it was really simple

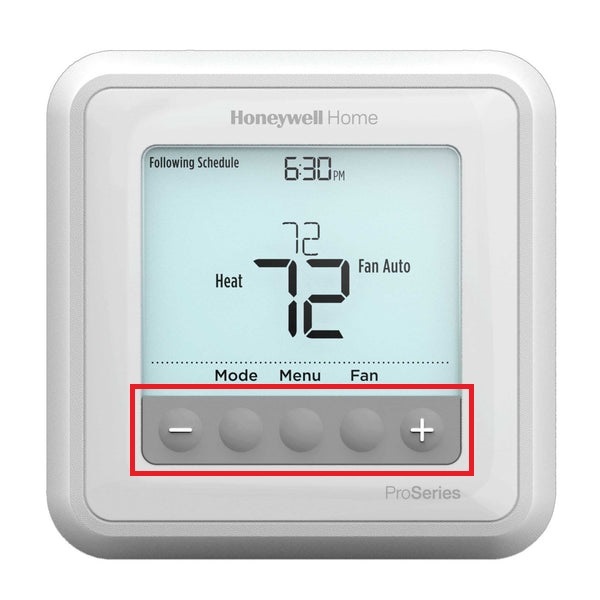
I think the title says it all but if needed - I'll edit this. Of course I googled but I got nowhere. Google results were total shit. Google won't help me if I don't know the exact name for that fucking thing. It's a very stupid design choice. Five regular old push buttons would be so much better.
About an hour ago I managed to stick it back on but I'm nearly 100% sure it's going to fall off again in week or two if not far sooner.
---
Edit
I don't mean part of the unit itself. I mean just the thin plastic cover over the buttons that's ~3mm thick.
I've been taken by a fey mood, not gonna lie. You ever be researching two different current hyperfixations, then reach a magical point where they suddenly intersect? That's where I'm at right now with hydrolysis and gems. I've been looking into building a machine to split water into oxygen and hydrogen for cutting stuff, because it turns out they're piss easy to make. Pretty simple so far, this is stuff some people learned in high school chemistry (not me, i never got past math). Hydrogen hot, add oxygen to make hotter, I at least know that from welding.
Then I find out that back in 1902, they figured out how to use just such a device, in conjunction with a special, also-shockingly-uncomplicated furnace, to grow huge corundum gems very quickly. That was also when I found out that corundum is a real thing and not a magic metal from skyrim. Apparently rubies and sapphires are the same thing, both corundum, just with differently colored trace minerals. Corundum itself is clear like diamond and almost as hard, 9 on the Mohs scale. So what's it made of? Just fuckin...aluminum oxide. Yeah, the stuff that's like 40 bucks for a 20 pound bag to use in sandblasters. 10 bucks for 2 pounds of the really pure stuff. It turns it into a big slug or rod of pure, genuine ruby or sapphire called a boule.
So my economy brain kicks in and I start looking up how much these boules go for online. One thing about these boules is that most of the time, you gotta split them in half lengthwise as they cool, so they don't shatter. This is how they're sold, as halves. Looking it up, a sapphire half-boule about 2 inches long goes for about 60 dollars. Sapphires seem to trend more expensive, probably as a result of lab rubies being more widely used industrially. One gemcutter on youtube (who was very nonplussed about this technique and coping about the literally microscopic differences in the resulting gems) said almost derisively that these boules can be grown in an hour or less. At that output and that price, what we have is a machine that takes cheap oxides and turns them into 2 dollars per minute.
And if I can eventually power the hydro machine with a solar panel, I'll be producing sapphires and rubies from nothing but oxides, electrolyte, water and sunlight
But wait, there's more! I have a small little electric jewelry furnace already, which while not suitable for conversion into a corundum furnace, is suitable for annealing the gems, cooling them slowly so the tension releases and they dont crack. So if I get this shit built, I will also have the built-in capability to produce massive, optical-quality gems. Also, being able to completely dab on every family holiday and gift-giving occasion for the rest of my life sounds nice.
So fuck it, why shouldnt I:
-Construct a hydrolysis machine
-Construct a verneuil furnace that is fueled by the hydrolysis machine
-Become a corundum dealer
-Invest the money into China
-???
-
Actually don't tell me why I shouldn't, I'm looking for encouragement in my alchemists journey
This post is about milk paint. I am currently in the tail stages of constructing my first piece of furniture, an antique inspired tool chest to hold my small collection and keep it organized and free from dust. The layout is largely based off of the anarchist's tool chest by Christopher Schwartz at lost art press, and is available free to download, only I am doing the plywood version which is available as a YouTube series as well. You can catch it here:
https://youtube.com/playlist?list=PLOUEnRdBNW4PsmAENQb-Y9UzrHnXzUjqc
Anyway I have been moving forward with a mix of hand tools and power tools depending on my mood or needs at the time, and being a beginning woodworker have left my share of tool marks, plane tracks etc, and of course a very healthy amount of wood filler. Any gap in joinery caused from being slightly out of square, or tearout when drilling countersink holes etc, I patched with filler and moved on, knowing the chest would be painted and nobody would be any the wiser.
Here is where milk paint enters the picture, in particular casein paint. One of the things I wanted to try was to finish the chest using an undercoat of red milk paint covered with black milk paint then finished with wax. Unlike modern plastic paints, these paints are less durable and wear through with time, the rationale being that as the chest is used the most frequently touched areas show the black wearing away with the red revealed underneath. This is a popular finishing technique particularly for antique inspired chairs.
I ordered casein powder and picked up borax from the local hardware store and ordered oxide pigments online. They are not hard to find. I made the binder, mixing the 5 parts casein to 2 parts borax in 18 parts water and heating to 140 and holding overnight. This is added to 3-5 parts of pigment and diluted with water for use.
You can see the grain of the wood really clearly in the OP pic. It shows the paint on a test piece where half is covered with a heavier first coat as there was more pigment in the mix, then a lighter second coat where the paint was watered down to stretch it for a second coat. Using this material I can get a range of different colors, depending on the application. Now the interesting part. This paint shows EVERYTHING. It absorbs into the grain and reveals the underlying texture, and highlights every imperfection. The tool chest looks like absolute shit. And I love it.
Here's a photo of some plane marks left behind and accentuated by the milk paint:

The end result is something that has unequivocally been created by human hands with attention and care (if not skill lol). You simply won't get this finish from a factory.
And my absolute favorite part? It's completely nontoxic. I painted the relatively large tool chest in my enclosed garage, in the winter, no fumes to deal with. When I spilled a bit on my pants I scrubbed it out with soap and water. When I am finished, I can pour the whole lot down the sink without worrying about introducing VOCs into my water supply! It's milk and borax!
I am from this point forward no longer using commercial paints for any but the most durability critical applications. No more waiting for household hazardous waste day, no more painting with a respirator with the garage doors wide open in 30 degree weather. Paint doesn't have to be toxic waste!
Next I will build a step stool for my little one and plan on finishing with milk based oxide paint. I can rest easy knowing that if she chews on it she will be safe. For that project I will also be investigating the use of homemade hide glue as an alternative to modern, plastic glues. It can be made with gelatin and salt. I've even heard of people using gummy bears.
This is one of the cooler things I've done and I wanted to share it with y'all. It really makes me reflect on what we've sacrificed in the name of "convenience" and "durability"

diy
Finally, a comm for that one user who hand-makes longbows. This ones for you, comrade.