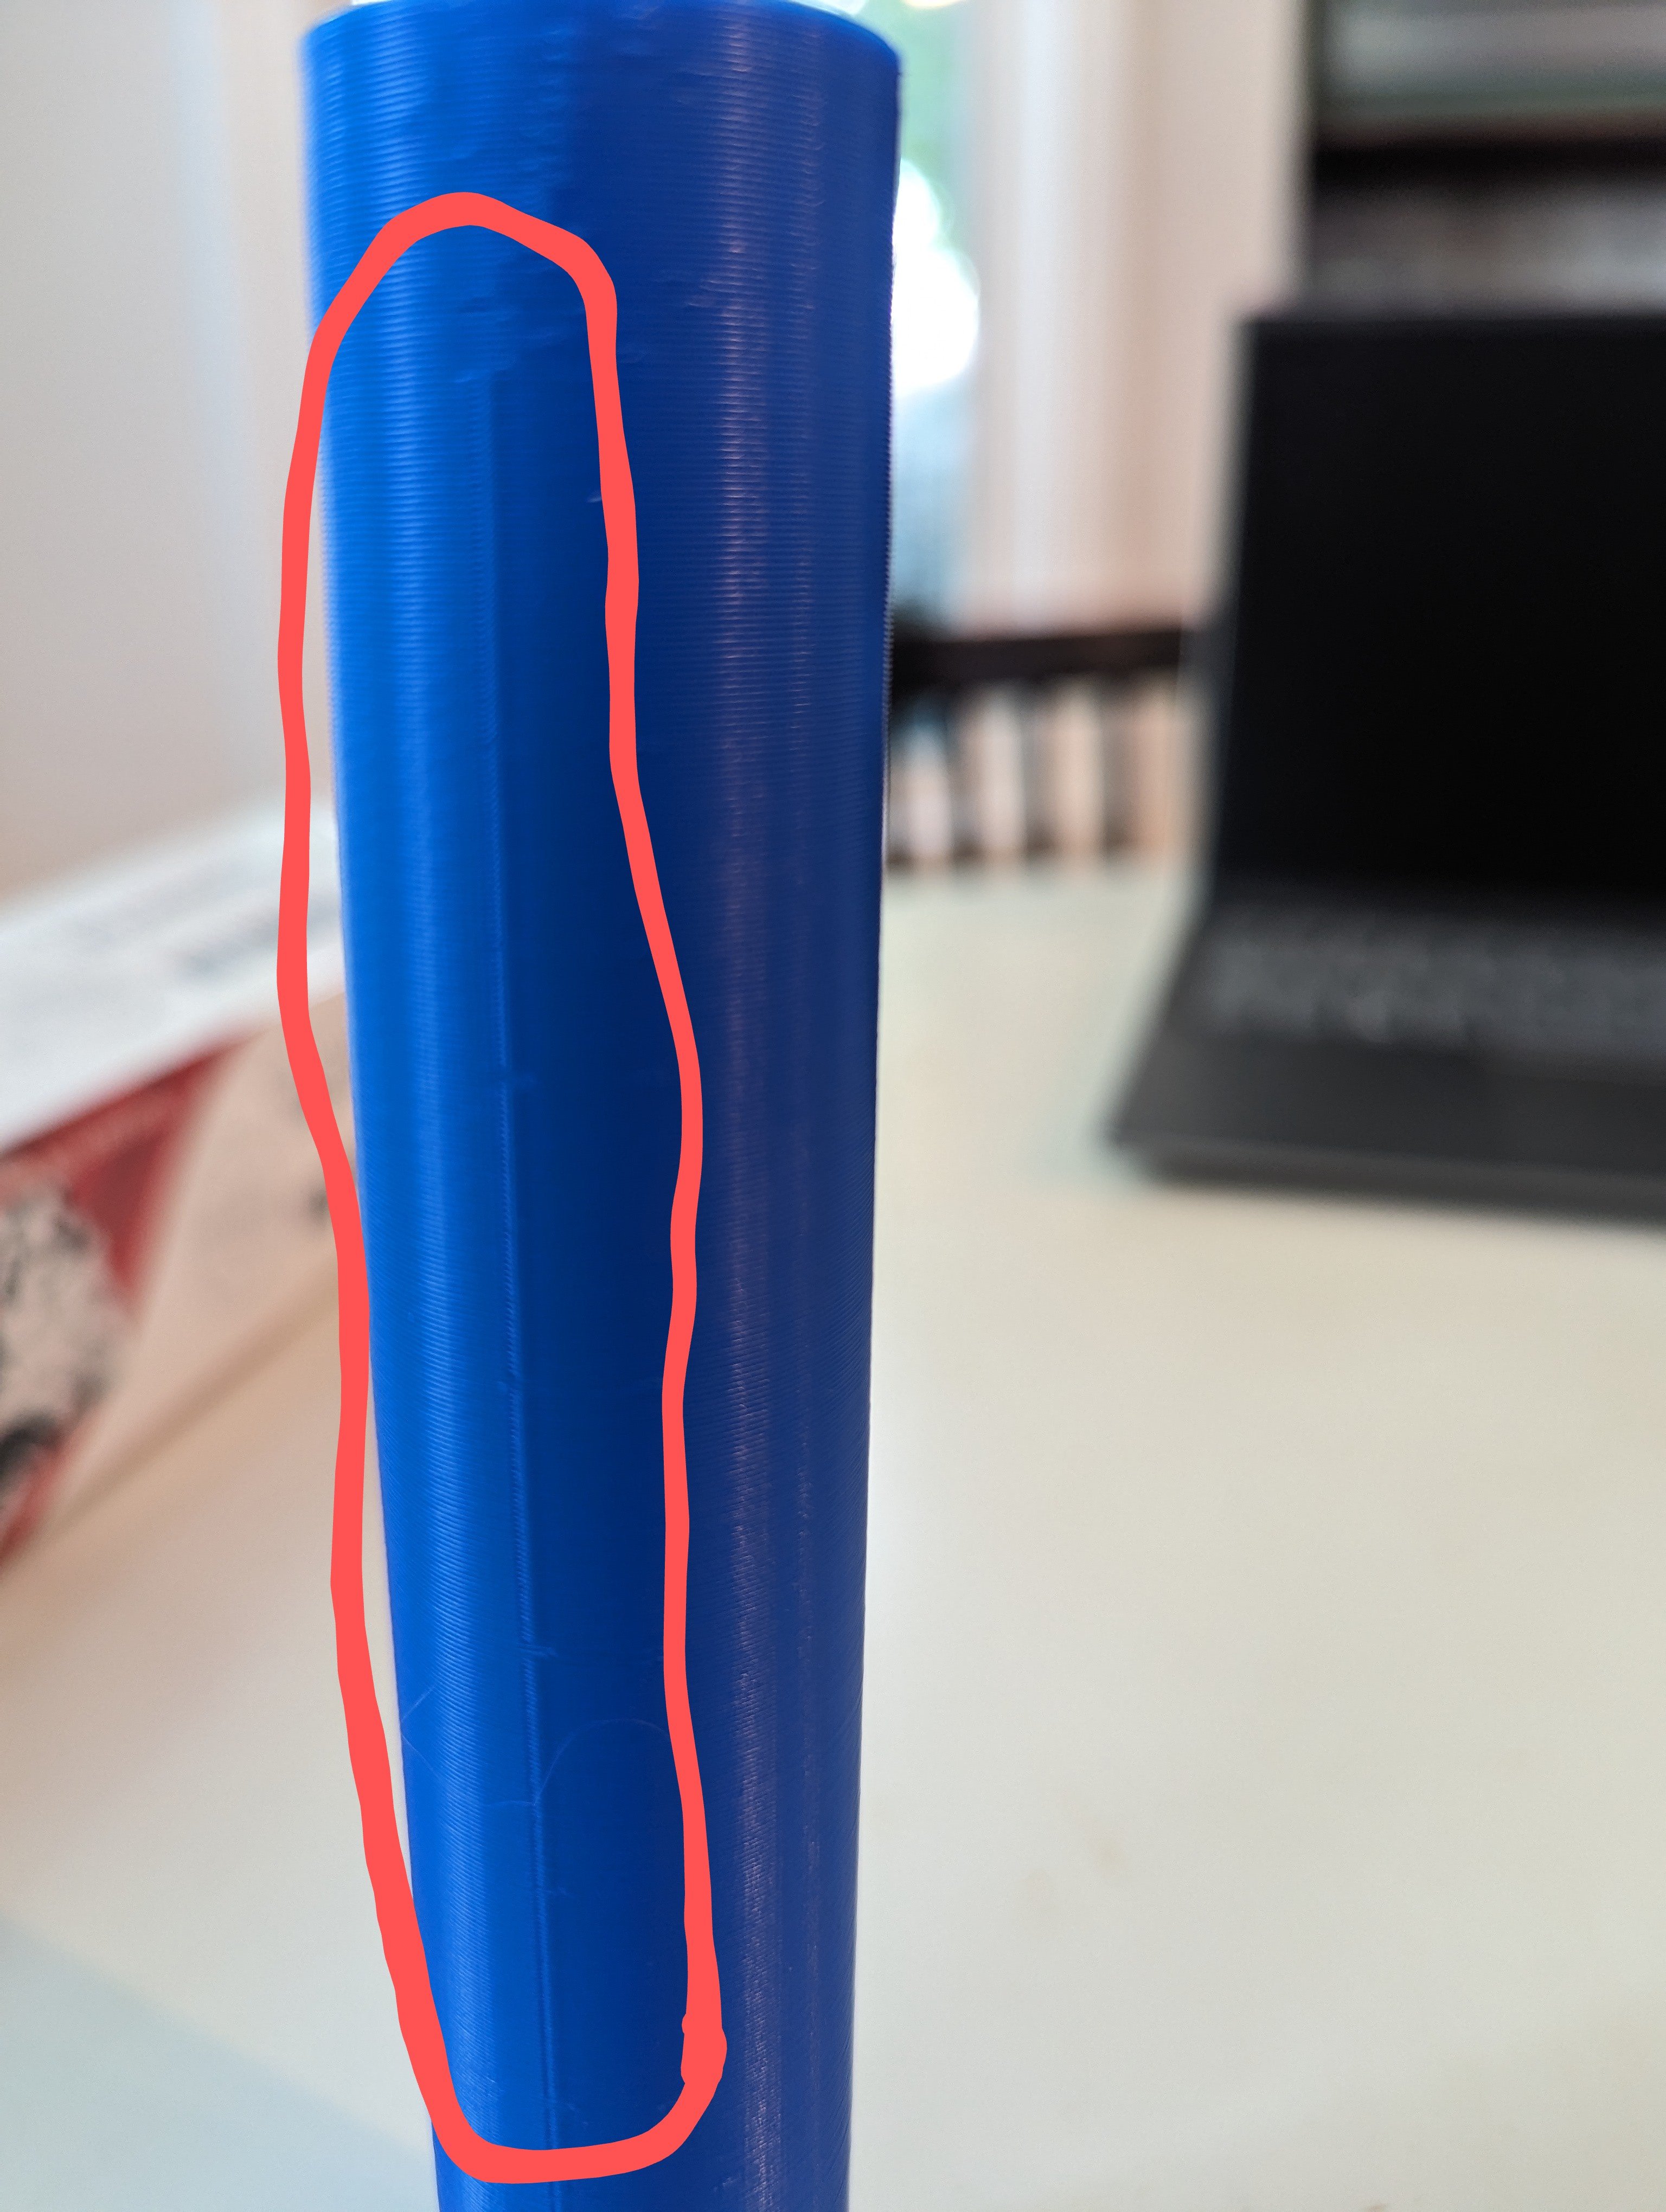
Printed this cylinder as part of a larger project and there's a horizontal line that runs up most of the part. Not bad enough to scrap the project but I'm curious if anyone can explain what causes this. Using an Ender 3 printing PLA, Cura slicer.
3DPrinting is a place where makers of all skill levels and walks of life can learn about and discuss 3D printing and development of 3D printed parts and devices.
The r/functionalprint community is now located at: [email protected] or [email protected]
There are CAD communities available at: [email protected] or [email protected]
No bigotry - including racism, sexism, ableism, homophobia, transphobia, or xenophobia. Code of Conduct.
Be respectful, especially when disagreeing. Everyone should feel welcome here.
No porn (NSFW prints are acceptable but must be marked NSFW)
No Ads / Spamming / Guerrilla Marketing
Do not create links to reddit
If you see an issue please flag it
No guns
No injury gore posts
If you need an easy way to host pictures, https://catbox.moe may be an option. Be ethical about what you post and donate if you are able or use this a lot. It is just an individual hosting content, not a company. The image embedding syntax for Lemmy is 
Moderation policy: Light, mostly invisible
Printed this cylinder as part of a larger project and there's a horizontal line that runs up most of the part. Not bad enough to scrap the project but I'm curious if anyone can explain what causes this. Using an Ender 3 printing PLA, Cura slicer.
This is quiet normal and not an error. It's the Z-Seam, caused by the printer when finishing a layer and briefly stopping the printhead, before lifting it along the Z-Axis to the next layer.
Here you can find more about this effect and how to reduce it.
Thanks. I appreciate it
Pick random for the z seam setting and it'll put it all over the print. This sometimes causes a worse effect, but if your printer is well calibrated then it'll be less obvious. I think there's even a setting to randomize it near the back of the print or near corners. The latter probably won't help much if you're printing a cylinder.
You're welcome :)
You should also know that the seam forms a weak point (this is true even if you change your settings to make the seam less visible). If this part of your project is structural (going to be put under stress/weight/wear) in some way then you should use a setting like "Random" so that the seam doesn't line up on every layer, and just accept that the surface will have bumps.
On the other hand, if this part is visual and doesn't need to be strong, then lining up the seam like this is good and you should just arrange the part so that the seam is on the back or inside area of your project.
Good to know for future prints. Thank you. This particular part of for a toy sword for my son, we're learning this hobby together so I appreciate the insight.
If you’re going to paint it, take the opportunity to sand the Z seam off before doing it
You can also look into a setting, I think it's called coasting. It will reduce the amount of plastic extruded towards the end of the layer to reduce the seam, but keep in mind this will look better but probably have less strength at this point
I highly suggest a few YouTubers that go into things like this, like makers muse and teaching tech
That’s the seam line where the printer finishes a layer. Thats normal. Most slicers have an options to manually define layer lines or randomize each layer. Random often creates bumps all over your print.
Oh ok. Thanks!